Poplar and Elm
Ok, so I haven't blogged in almost a month. Maybe you think this means that I haven't knit anything... hehehe, that would be incorrect. But I think I can still keep to the one blog post, one project thing.
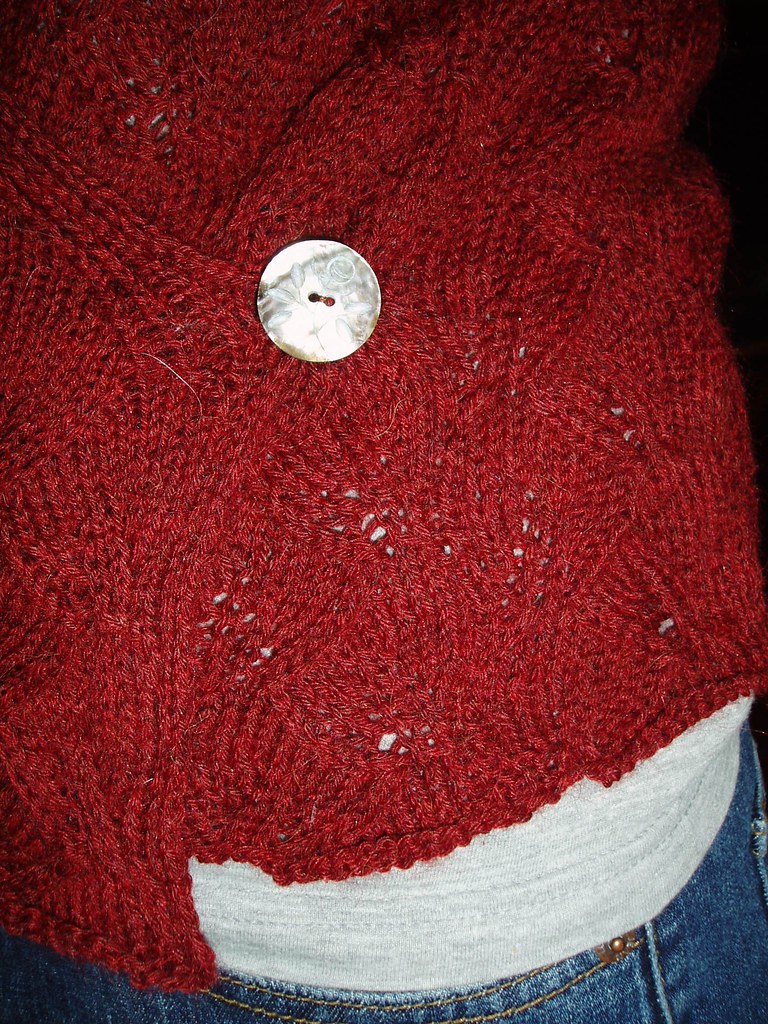
Today I will tell you about Poplar & Elm, a truly lovely sweater from Twist Collective. This one caught my eye immediately -- I'm sort of obsessed with the idea of wrap sweaters like this, but there is often something unsatisfactory about the pattern. Poplar & Elm has the shape of a wrap sweater, but is actually fastened by two buttons, one on either side. This is a great idea, I think, because knitting and belts often don't go together as well as you'd like.
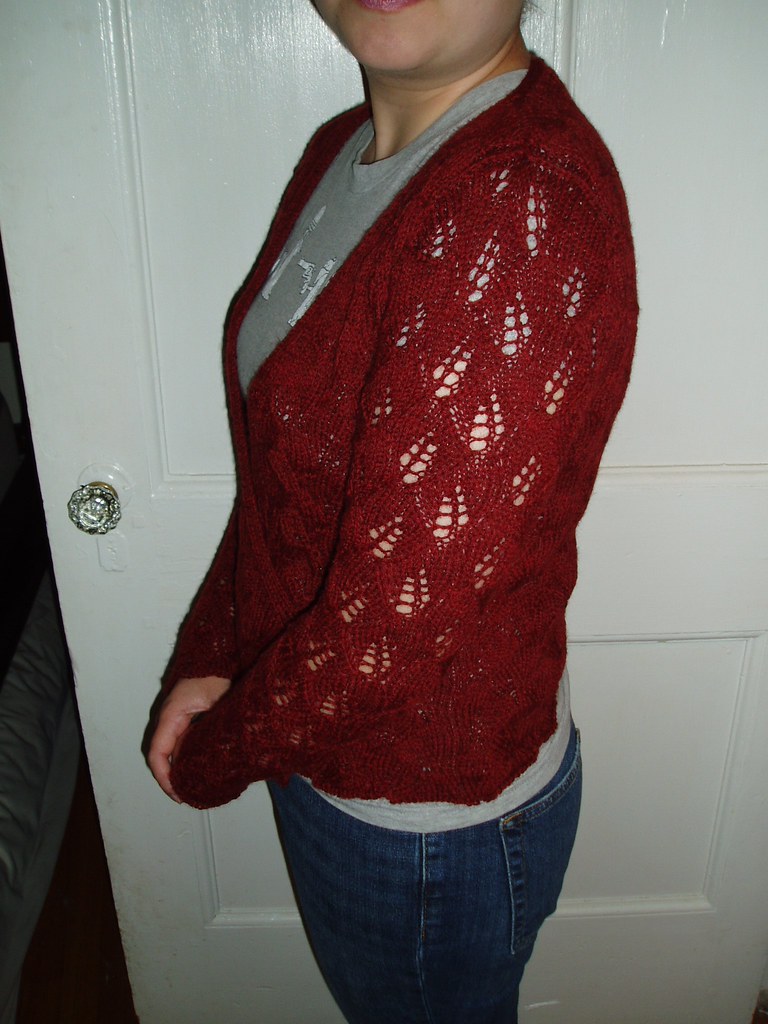
This sweater has two lace patterns: the Poplar pattern on the back and fronts, and the Elm pattern on the sleeves. They are really the same pattern, except that where the Elm pattern has yarn overs, the Poplar pattern has right- and left-leaning increases. The result is the same look, but more open sleeves. A simple, elegant idea, I think.
I modified this pattern pretty heavily, just in the way it was constructed. I don't like to set in sleeves, and I've recently figured out how to modify a set-in sleeve pattern to be done without the seam, and so I've been trying to do that a lot. This was no exception. I did the fronts and back in one piece up to the armholes. My intention was then to knit the arms in the round up to the armholes and combine it all into a sort of yoke with set-in sleeve cap shaping. However, very soon after I started the sleeves, I realized that if I wanted to do them at the same time, I was going to have to do them flat, or else do some extreme fiddling to make the lace pattern work. So I ended up doing the sleeves flat. Then, when I got to the point where I joined them to the yoke, I basically pretended that they were done in the round and proceeded from there. I sewed up the sleeve seams at the end. The only other seam was to attach the back neck edge to the back neck, and there was a small graft at each underarm and a three-needle bind-off at each shoulder. Finally, I just sewed the buttons right onto the sweater, rather than putting the inside button on a string (crochet chain) as the pattern suggests. The point of this was probably to have the inside button attach to the strong side seam, rather than the weaker main part of the fabric, no matter where you wanted the button to actually meet the buttonhole. Since I didn't have side seams anyway, this wasn't really relevant for me.
The only thing that stressed me out at all about this project was the gauge. I was getting a little under gauge, and I did the instructions for a size up to compensate. However, I was still scared the whole time that the sweater would turn out too small. As it is, I think it's fitted, but not too small. Success! The yarn I used was Berroco Ultra Alpaca Fine, when I probably should have used Berroco Ultra Alpaca Light. The pattern calls for a sport weight, and WEBS lists Fine as a fingering weight and Light as a DK. I also misread the gauge: it says 34 sts/5.5 in, and I just assumed it was 34 sts/4 in, a fine gauge for fingering weight. Also, the Fine was on sale, so I went for that. Now I think the Light would have gotten gauge better. Also, when I bought it, I didn't realize that Fine had 20% nylon in it, making it a different fiber content from the other yarns in the Ultra Alpaca family. I wasn't really a fan of the 20% nylon, it made the yarn feel less nice than the Ultra Alpaca I've worked with in the past. But hey, maybe it will be stronger.

All in all, I was a little stressed while knitting this, but I'm pleased with the result.
Today I will tell you about Poplar & Elm, a truly lovely sweater from Twist Collective. This one caught my eye immediately -- I'm sort of obsessed with the idea of wrap sweaters like this, but there is often something unsatisfactory about the pattern. Poplar & Elm has the shape of a wrap sweater, but is actually fastened by two buttons, one on either side. This is a great idea, I think, because knitting and belts often don't go together as well as you'd like.
This sweater has two lace patterns: the Poplar pattern on the back and fronts, and the Elm pattern on the sleeves. They are really the same pattern, except that where the Elm pattern has yarn overs, the Poplar pattern has right- and left-leaning increases. The result is the same look, but more open sleeves. A simple, elegant idea, I think.
I modified this pattern pretty heavily, just in the way it was constructed. I don't like to set in sleeves, and I've recently figured out how to modify a set-in sleeve pattern to be done without the seam, and so I've been trying to do that a lot. This was no exception. I did the fronts and back in one piece up to the armholes. My intention was then to knit the arms in the round up to the armholes and combine it all into a sort of yoke with set-in sleeve cap shaping. However, very soon after I started the sleeves, I realized that if I wanted to do them at the same time, I was going to have to do them flat, or else do some extreme fiddling to make the lace pattern work. So I ended up doing the sleeves flat. Then, when I got to the point where I joined them to the yoke, I basically pretended that they were done in the round and proceeded from there. I sewed up the sleeve seams at the end. The only other seam was to attach the back neck edge to the back neck, and there was a small graft at each underarm and a three-needle bind-off at each shoulder. Finally, I just sewed the buttons right onto the sweater, rather than putting the inside button on a string (crochet chain) as the pattern suggests. The point of this was probably to have the inside button attach to the strong side seam, rather than the weaker main part of the fabric, no matter where you wanted the button to actually meet the buttonhole. Since I didn't have side seams anyway, this wasn't really relevant for me.
The only thing that stressed me out at all about this project was the gauge. I was getting a little under gauge, and I did the instructions for a size up to compensate. However, I was still scared the whole time that the sweater would turn out too small. As it is, I think it's fitted, but not too small. Success! The yarn I used was Berroco Ultra Alpaca Fine, when I probably should have used Berroco Ultra Alpaca Light. The pattern calls for a sport weight, and WEBS lists Fine as a fingering weight and Light as a DK. I also misread the gauge: it says 34 sts/5.5 in, and I just assumed it was 34 sts/4 in, a fine gauge for fingering weight. Also, the Fine was on sale, so I went for that. Now I think the Light would have gotten gauge better. Also, when I bought it, I didn't realize that Fine had 20% nylon in it, making it a different fiber content from the other yarns in the Ultra Alpaca family. I wasn't really a fan of the 20% nylon, it made the yarn feel less nice than the Ultra Alpaca I've worked with in the past. But hey, maybe it will be stronger.
All in all, I was a little stressed while knitting this, but I'm pleased with the result.
posted by Anisa at
12:59 PM
![]()

1 Comments:
Just stumbled across your blog and I absolutely love this sweater that you've made! It's so nice to find other knitters on the web! :D
star-crossed smile
Post a Comment
Subscribe to Post Comments [Atom]
<< Home